Kimura Trap No-Gi: 7 Attacks From a Single Grip
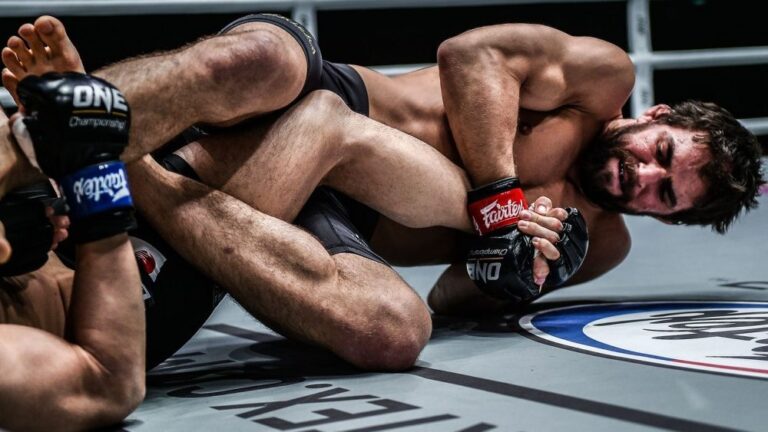
Three of Garry Tonon’s submission victories in ONE Championship came from kimura-based attacks — not because he’s stronger than his opponents, but because the kimura trap locks them into a system they can’t simply muscle out of. Once you have the figure-four grip secured and your body positioned correctly, your opponent’s defensive options create new attacks rather than neutralize the threat.
Most grapplers learn the kimura as a single finishing move — you catch the arm, you rotate it, you get the tap. The kimura trap treats that same grip as an entry point to a dozen different attacks. This article breaks down seven of the most reliable, ordered by how often they appear at competition level.
One note before we start: most people are taught the kimura trap from back control, as if the back is where it lives. That’s backward. The seated guard entry is more versatile, more available, and harder to shut down — you’re setting the trap from a neutral position rather than from a dominant one you’ve already had to earn.
What Is the Kimura Trap?
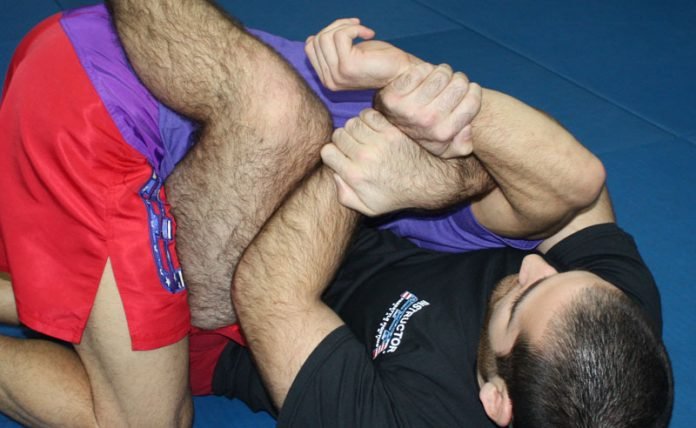
The kimura trap is a positional control system, not just a submission. The foundation is the figure-four grip on your opponent’s wrist and arm — same as a standard kimura — but the trap treats that grip as a control mechanism rather than a finish attempt.
When you lock the kimura trap properly, your opponent’s arm is effectively pinned across your body. They can’t post, they can’t defend chokes with that arm, and any attempt to pull it free opens a rotation that either completes the kimura or transitions to another attack. This is why the system is so effective: the better your opponent defends one attack, the more clearly they expose the next one.
The key technical detail that separates a real kimura trap from a loose kimura grip is hip contact. Your hips need to be tight against your opponent’s back or side — a gap here lets them survive by spinning into you. The grip controls the arm; your hips control the body. Both pieces are required.
At the elite no-gi level, Gordon Ryan’s back control system is built heavily around the kimura trap as a tool to isolate the upper body while threatening the neck. Danaher Death Squad athletes use it to chain attacks together rather than committing hard to any single finish.
Setting Up the Kimura Trap from Back Control
From back control with both hooks in, start by clearing your opponent’s near-side arm defense. If they’re framing against your choking arm or protecting their neck with both hands, use your top hand to strip one wrist outward, then shoot your arm underneath and secure the figure-four on their arm before they can recover the position.
The classic entry is when your opponent reaches back to defend your rear naked choke. The moment their arm comes back behind their head or they try to peel your arm off, their elbow rises and creates the opening. Shoot the figure-four immediately — don’t wait to see if it’s deep enough.
Once you have the grip, the critical adjustment is pulling their elbow tight to your chest and pinching it there with your elbow. A loose grip lets them rotate out. The figure-four is your brake; your chest is the wall their elbow runs into. From this locked position, you can attack in any of the directions below depending on how your opponent reacts.
For more on controlling the upper body in no-gi, the principles that apply to the americana in no-gi overlap closely with kimura trap mechanics — both rely on arm isolation and hip pressure rather than raw grip strength.
Attack 1: The Straight Kimura Finish
The baseline attack is the one the position is named for. With the figure-four secured and your opponent’s elbow pinned to your chest, rotate their arm toward their shoulder blade by driving your top forearm down while keeping the wrist controlled. The rotation is perpendicular to their body — if you’re pushing their wrist toward their feet, you’re off angle and losing power.
The common mistake is trying to finish from flat on your back. Sit up toward the trapped side as you rotate — this uses your lat and chest rather than just your bicep, and it cuts the range of motion your opponent has to endure. Elbow control is everything: if their elbow drifts away from your chest even slightly, the submission loses most of its leverage and they can spin out.
At the competition level, this straight finish is mainly a threat that sets up the other attacks. Most experienced grapplers will posture and tuck their elbow to their hip to neutralize it — which is exactly the reaction that opens the back triangle.
Attack 2: The Back Triangle from Kimura Trap
When your opponent drives their elbow down toward their hip to defend the straight kimura, they’re moving their arm exactly where you need it for the back triangle. Release the figure-four, and instead of letting their arm go, trap it between your leg and their neck by throwing your leg over their shoulder from the back control position.
The back triangle from here is tighter than a standard rear naked choke because the arm is already isolated — they can’t reach across to relieve the pressure on their carotid. The finish is the same as any other triangle: lock your ankle behind your knee, squeeze your knees together, and adjust your angle so the pressure comes from the side of your knee rather than the back of your thigh.
This transition is why the kimura trap is particularly punishing for defenders who commit hard. The more aggressively they defend the kimura, the faster they hand you the triangle. Competition footage of Tonon and Craig Jones both show this exact chain repeatedly — let the opponent choose their own punishment.
Attack 3: Rolling to the Turtle and Finishing
If your opponent rolls forward to escape back control — the most common instinct — you follow the roll while keeping the kimura grip locked. Instead of fighting to stay on their back, go with the roll and let it bring you to a standing position while they end up in turtle. Your figure-four is still on their arm; now you have gravity working for you.
From the turtle with the grip locked, step around their head to the far side and pull upward. This is the standing kimura finish, sometimes called the ninja roll entry. The arm rotates past where it can bend safely, and they’re tapping long before you have to work hard.
The technical detail here is staying connected at the hip during the roll. Grapplers lose this attack by letting their hips separate from their opponent’s back — the grip alone isn’t enough to control the roll. Stay tight, roll with them, and the finish lands cleanly at the end of the movement.
Attack 4: The Kimura Trap to Armbar
The armbar transition opens when your opponent rolls toward you rather than away — they’re trying to face you and fight the grip from guard. Keep the figure-four locked as they roll into you, then post your far leg over their head and drop your hips to the mat. You’ve transitioned from back control directly into an armbar without releasing the grip.
This is a more advanced transition because the timing has to be right — if you hesitate when they start rolling toward you, you lose position rather than gain an armbar. The setup requires trusting the process: when they roll in, go immediately to the armbar configuration rather than trying to maintain back control.
The elbow should be on your hip with your knees pinching their upper arm. Extend your hips toward the ceiling, not away from your opponent. This is a common point where grapplers lose the finish — they push back instead of up, which gives the opponent room to stack and roll through.
The mechanics here connect to wrist lock attacks in no-gi — both involve controlling the elbow joint from a dominant upper body position, and a wrist lock can often be layered onto a failing armbar attempt.
Attack 5: The Kimura Trap to Rear Naked Choke
The rear naked choke from the kimura trap is a combination attack rather than a direct transition. You use the kimura threat to force your opponent to commit both hands to the trapped arm — trying to peel your grip off — and in doing so, they strip the primary defense from their neck.
The sequence: lock the figure-four and squeeze hard enough that they panic and reach across with their free hand to fight the kimura. At that moment, their neck is open. Release the figure-four, shoot your choking arm under their chin, and lock the rear naked choke before they can reframe. The speed of the switch matters — a slow release gives them time to drop a hand back to the neck.
Gordon Ryan uses this exact combination constantly in competition, sometimes faking the kimura finish before switching to the choke, sometimes making genuine finish attempts until the opponent’s focus fully commits to the trapped arm. The system works because your opponent cannot effectively defend both threats at once.
Attack 6: The Sweep When They Defend
If you’re working the kimura trap from a top half guard or side control position rather than from the back, your opponent’s defensive hip bridge becomes a sweep opportunity. When they bridge hard to escape the kimura, they’re momentarily lifting you off the mat — use that energy to roll them over your own body and end up in top position on the other side.
The sweep itself isn’t forced; you’re following their escape attempt. Keep the figure-four grip, stay low and tight, and let their bridge do the work. A common error is trying to muscle the sweep independently — this doesn’t work against larger opponents. Use the reaction, not independent strength.
From half guard in no-gi, the kimura trap is an excellent tool for securing the arm before going to back take attempts. The half guard entry into the kimura trap is worth drilling separately — it’s a natural combination that flows from common half guard scrambles.
Attack 7: Kimura Trap from Seated Guard
This is the entry most people skip, and it’s the most important one. From seated guard against a standing or kneeling opponent, post one foot on their hip and reach up to secure the figure-four on their near arm. You’re trapping the kimura before any scramble happens — before they have good base, before they’ve established their own grips.
The seated guard entry is more reliable than the back control entry because you don’t have to earn the dominant position first. You’re interrupting their pass attempt or takedown attempt by securing the arm and threatening the kimura from a neutral starting position. If they try to posture up and pull away, follow them to your feet and complete the standing finish.
The same figure-four grip from seated guard can flow into a guard pull to armbar, a sweep by dragging the arm across their body, or a transition to the turtle attacks described above. This is why the seated guard is the better starting point: you have more directions to go from neutral than you do from the back, where you’ve already used a dominant position to set up the trap.
Defending the Kimura Trap
The most effective single defense against the kimura trap is hand connection — grab your own thigh or your own belt (in gi) with the threatened hand. This doesn’t break the figure-four, but it cuts off the rotation that makes the submission work. From there, you’re fighting to recover position rather than fighting the kimura directly.
Posture matters as much as grip defense. Staying low and keeping your elbow driven toward your hip limits the range of rotation available to your opponent. Standing up — the instinct of many new grapplers — actually opens the standing kimura finish rather than shutting down the attack system.
The worst defense is reaching across with your free hand to fight the kimura grip. This leaves your neck open for the rear naked choke transition. Prioritize the hand-to-thigh connection first, then work position recovery. Fighting the grip with your other hand is how you hand your opponent Attack 5 above.
At the competition level, the best defenders against the kimura trap are those who recognize it early and frame against the initial grip rather than waiting until the figure-four is fully locked. For a broader look at submission defense positioning, Jiu-Jitsu Times has covered back control defense extensively, and BJJ Fanatics carries several instructionals specifically addressing the Danaher back system.
Sources
- Jiu-Jitsu Times — Back Control Defense Analysis
- BJJ Fanatics — John Danaher Back Attack System Instructionals
- FloGrappling — WNO Competition Footage and Analysis
Image credit: bjj-world.com